Summary:
Overview
The Startup step is the first stage of the Setup Wizard on both Altitude and NOVA.
It ensures the processor is correctly initialized before speaker declaration or routing begins.
This step includes:
- A shared Welcome page (language selection, connection reminders, direct-access utility buttons).
- A branching question that defines the rest of the workflow:
- Altitude: WaveForming - Yes/No
- NOVA: Monitor Controller - Yes/No
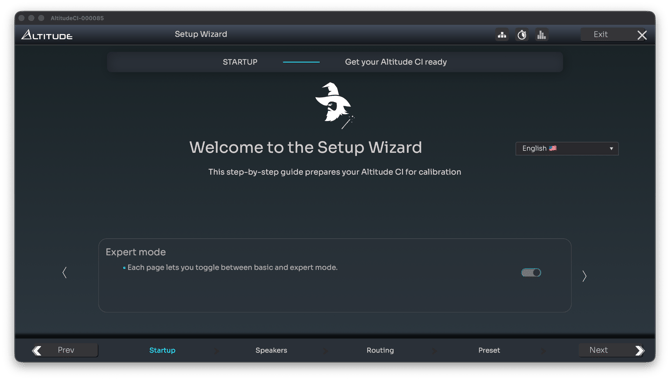
Welcome Screen (Altitude & NOVA)
When you launch the Setup Wizard for the first time, or create a new preset, you begin on the Welcome screen.
This page provides critical contextual information and links to key system utilities that remain accessible throughout the entire wizard.
Language Selection
You may select the interface language here.
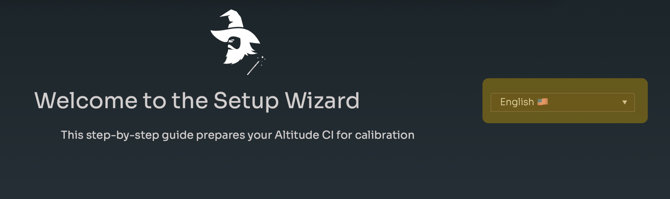
Currently supported: English and French.
Information Frame
The scrolling information cards provide essential reminders about:

 Volume Panel
A dedicated icon in the top bar allows access to the volume control panel at any time, even during configuration.
Users can view input/output meters and toggle a fullscreen view.
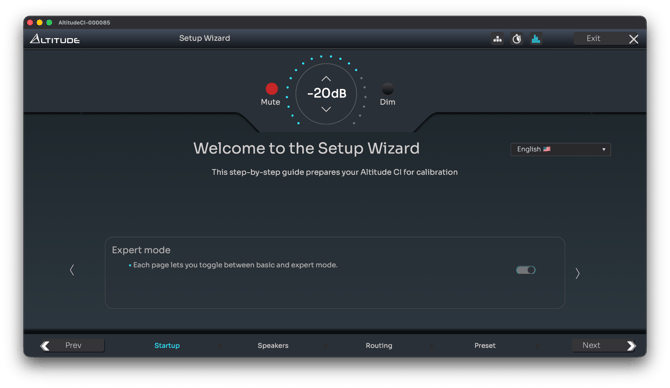
This avoids having to leave the wizard to troubleshoot signal flow or adjust listening levels.
Please refer to Volume Control for more details.
Expert Mode
The Welcome page includes a reminder that some pages in the Setup Wizard may run in Basic or Expert mode.
- Basic mode: simplified layout templates and guided workflow
- Expert mode: full manual control (speaker naming, signal routing, input formatting, crossover assignment, etc.)
Please refer to Basic vs Expert Mode: How the Interface Works for more information.
 Clock Settings
The Welcome screen contains a critical reminder:
- Calibration must be performed at 48 kHz
- If there is no sound, clock configuration should be checked first
- Clock settings apply globally to all presets
The Clock icon is accessible at all times during the wizard and should be used whenever audio output is missing.
Please refer to Clock Settings for more information.
 Network Settings
Although network configuration is usually completed before the wizard is launched, The Network icon remains available during Setup.
This is particularly important if:
- You plan to run Audio over IP (AES67 or Dante depending on the platform)
- You need to confirm IP settings, DHCP status, or VLAN separation
- You are configuring the processor remotely or from a different network segment
Please refer to Essential Network Guide for Trinnov Processors to learn more about network.
Platform-Specific Branching Step
After the Welcome page, the Setup Wizard diverges depending on the platform.
AltitudeCI - WaveForming Selection
AltitudeCI asks a simple, decisive question: “Will you use WaveForming?” – Yes / No
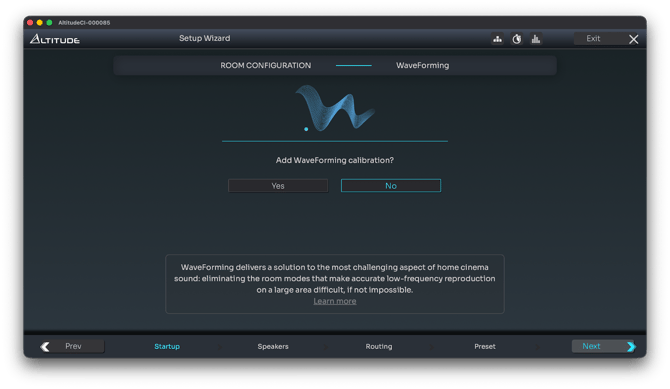
This choice determines whether additional WaveForming configuration and calibration steps will appear later.
When to select Yes
Choose Yes if:
- You have at least four subwoofers (required minimum)
- Your installation includes subwoofers placed at the front and rear of the room
- You intend to perform WaveForming calibration during the workflow
Selecting Yes unlocks additional steps in the Calibration wizard:
- WaveForming subwoofer role assignment
- WaveForming measurement mapping
- WaveForming calibration
When to select No
If your system does not meet the minimum requirements, or the project does not involve WaveForming, select No.
All conventional configuration and calibration steps remain available.
You can learn more about WaveForming on our website.
NOVA - Monitor Controller Selection
NOVA does not include WaveForming.
Instead, its workflow branches based on whether NOVA will operate as a monitor controller.
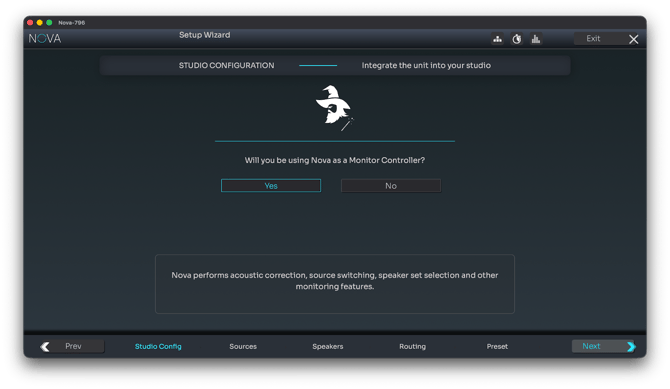
“Use NOVA as a Monitor Controller?” – Yes / No
This decision has major implications for the rest of the configuration.
If Yes: NOVA becomes the monitor controller
NOVA will handle:
- Source selection
- Speaker-set switching
- Volume control
- Downmixing
Choosing “Yes” unlocks:
- Source declaration
- NOVA works with PCM inputs, not bitstreams
- Each source must be assigned manually:
- Input connector
- Channel format (mono/stereo/5.1)
- Routing
- Input level offsets (expert mode)
- Speaker Set declaration
- Multiple speaker sets may be defined
- Optimized or unoptimized sets supported
- Useful for B-chain monitoring, alternate arrays, or rapid A/B evaluation
- Routing overview
- A simplified view of how input sources connect to speaker sets
- Shown only in Expert Mode
This branch essentially transforms NOVA into the central hub of a studio or multi-set monitoring environment.
If No: NOVA receives audio from an external monitor controller
Choose this option when:
- A dedicated monitor controller (e.g., Studio I/O matrix, Dante controller, immersive monitor controller) handles switching
- NOVA is used only as a processing and optimization stage
- Inputs and outputs must be defined manually in a full routing matrix
Selecting No unlocks:
- The full input-to-output routing matrix
- Maximum flexibility for external monitoring ecosystems
- A more minimal workflow, skipping source/speaker-set declaration entirely
This branch is ideal for studios where the NOVA should process audio but not manage monitor switching.
After the Startup Step
Once the Startup step is complete, the workflow moves to:
- AltitudeCI: Speaker Declaration → Routing → Preset
- NOVA:
- If Monitor Controller = Yes → Source Declaration → Speaker Sets → Routing Overview → Preset
- If Monitor Controller = No → Full Routing Matrix → Preset
Calibration follows next and is identical on both platforms, except for the additional WaveForming stages on Altitude.