Summary:
Introduction
Why speaker declaration matters
Speaker Declaration defines the physical loudspeaker layout of your system.
In this step, you specify:
- How many speakers and subwoofers the processor must handle
- (NOVA only) How these speakers are grouped into Speaker Sets
- Which channel role each speaker or subwoofer is intended to reproduce
This information allows the processor to build the correct routing, measurement plan, decoding layout and Optimizer processing pipeline.
Altitude vs NOVA
- Altitude uses a single speaker system, typically large and permanent.
- NOVA supports multiple Speaker Sets, as required in studios where engineers switch between nearfields, mains, alternates, and may share a subwoofer across sets. All sets are calibrated in one pass.
What this step does not configure
Speaker Declaration focuses only on defining what is physically present. It does not include:
- Declaring multi-way speakers (done later in Routing)
- Setting bass management
- Adding pre-measurement EQ to speakers or subwoofers
- Configuring output routing
- Adjusting decoder channel mapping (Altitude)
- Setting downmixing or monitor behaviour (NOVA)
Tip: If you are unsure where a later function is configured, look at the Setup & Calibration Workflow article.
Requirements and critical warnings
System Structure Becomes Fixed After Declaration
Speaker Declaration should normally be done only once for a preset.
Changing the speaker layout later requires:
- Reopening the wizard
- Re-declaring all speakers and subwoofers
- Running a full system calibration again
It is not possible to add a single speaker or subwoofer without restarting the process.
Warning: Any change in speaker count, subwoofer count, or speaker way count invalidates the calibration.
Output Count and License Limits
Your system’s maximum size is constrained by:
- The number of physical outputs available on the processor
- The number of licensed channels
The processor will not allow a configuration exceeding these limits.
How to access the speaker configuration page
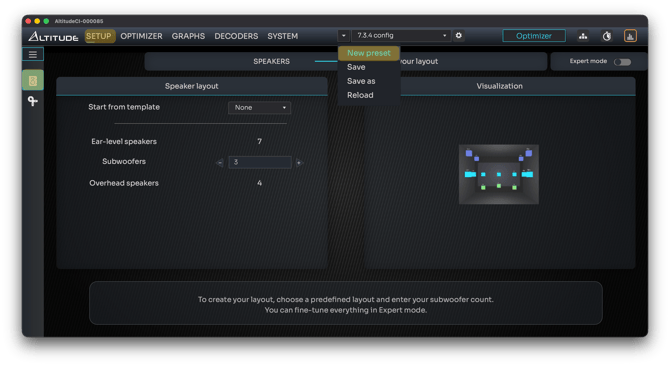
During Startup or New Preset
The Speaker Declaration step appears automatically in the wizard when:
- The processor is powered on for the first time
- You create a new preset
From the Menus (Existing Preset)
On both platforms:
Setup → Configuration → Speakers
On NOVA, an additional shortcut is available directly from the home page.
Speaker Declaration on Altitude
Basic Mode
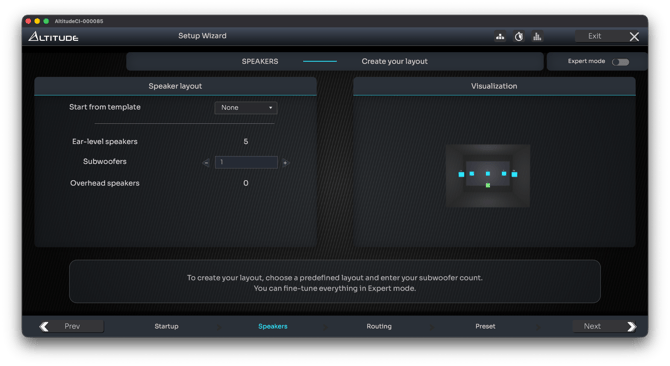
In Basic Mode, the setup process is simplified:
- Start from template
- Add subwoofers
- Visualize your layout
Start from template
These templates are available through the “Start from Template” dropdown menu, located on the middle left side of the screen.
Choose the template that most closely matches your physical speaker configuration.
Templates are based on common layouts such as 5.1, 7.1.4, and other immersive formats.
Add subwoofers
You can easily increase or decrease the number of subwoofers using the plus ![]() or minus
or minus ![]() buttons near the “Subwoofers” setting at the top right. However, in Standard Mode, specific speaker positions (for example, adding a Front Wide Left/Right pair) cannot be added or removed individually.
buttons near the “Subwoofers” setting at the top right. However, in Standard Mode, specific speaker positions (for example, adding a Front Wide Left/Right pair) cannot be added or removed individually.
If you need to customize your layout more precisely, such as adding wide, height, or top layer speakers, switch to Expert Mode.
Visualize your layout
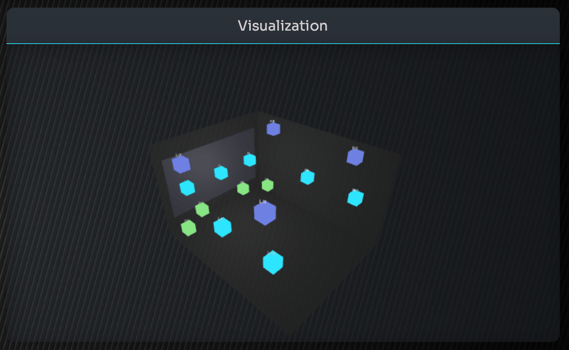
After selecting a template and adding the correct number of subwoofers, your speaker layout appears in the right-hand panel.
Tip: you can rotate and zoom the 3D view with your mouse and scroll wheel to inspect speaker positions and names.
About Speaker Templates
Default templates include:
- Stereo (2.0)
- 5.1
- 7.1
- 5.1.2
- 5.1.4
- 7.1.2
- 7.1.4
- 9.1.4
- 9.1.6
- 11.1.6
- 11.1.8
Note: default templates are all based on Dolby Atmos but the channel matching for other formats will be done automatically.
Warning: if you want to declare speakers specific to Auro-3D or DTS:X such as the Top / voice of god speaker, you must use the Expert mode.
Expert Mode
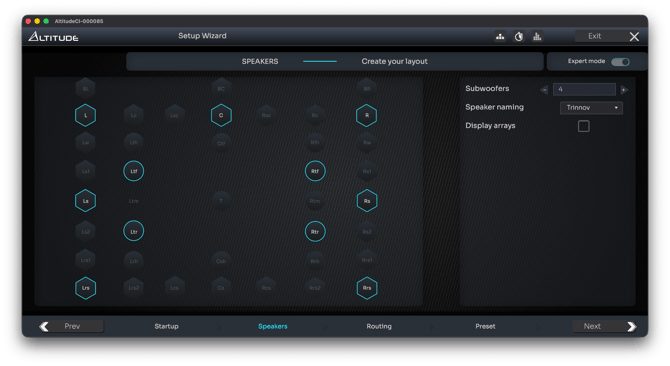
Provides complete flexibility for creating or modifying any speaker layout supported by the Altitude platform.
Format visualization and naming convention
This mode supports layouts from multiple audio formats and industry standards, including:
- Dolby Atmos
- DTS:X
- Auro-3D
- Trinnov Recommended Layouts
- CEDIACTA RP22 Guidelines
Caution: each format uses slightly different naming conventions, so you may notice variations between layout options.
Tip: switching modes shows which speaker positions are supported or unsupported by each format, as well as their equivalents.
Within this mode, you can add or remove any speaker position by clicking its icon.
Note: when you select certain speakers, such as Left Wide speaker, its mirror counterpart, Right Wide is added automatically to maintain system symmetry.
Also note that:
- Single speakers such as Center, Top Front, or Top Middle can be added individually.
- You can adjust subwoofer count using the controls in the top-right corner.
- This level of customization ensures that the declared layout precisely matches your physical speaker installation, an essential step for accurate calibration and spatial rendering.
Surround Arrays
In larger theaters or commercial installations, it may be necessary to use speaker arrays. A speaker array consists of multiple physical speakers wired together in parallel or series to reproduce the same signal.
While arrays are not very common in residential systems, they are used quite regularly in professional cinemas, particularly for surround channels.
Tip: Arrays can also help maximize speaker usage when reproducing native immersive consumer content with limited object activity.
Arrays are typically configured for the following channels:
- Left surround
- Left rear surround
- Right surround
- Right rear surround
Setting up an array of 2 speakers on each side for Ls / Rs
To enable arrays, select the Display Arrays checkbox.
The system will then display additional arrayed speaker as a double hexagon in teal.
Use the plus ![]() or minus
or minus ![]() buttons to establish the correct number of arrayed speakers.
buttons to establish the correct number of arrayed speakers.
Relation to decoding
Although the default routing based on your speaker declaration should ensure seamless playback for all supporter formats, it is possible to manually adjust channel-to-speaker making in the Decoders page.
Speaker Declaration on NOVA
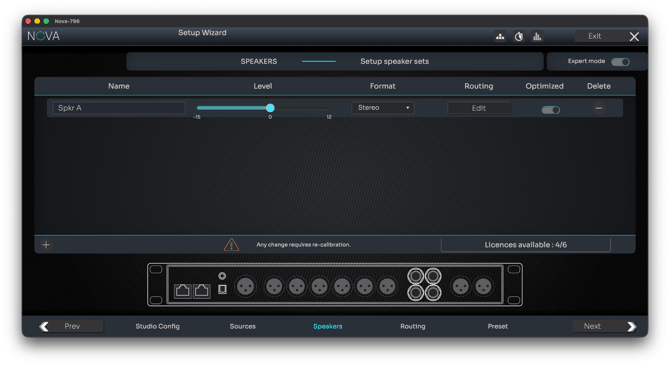
Basic mode
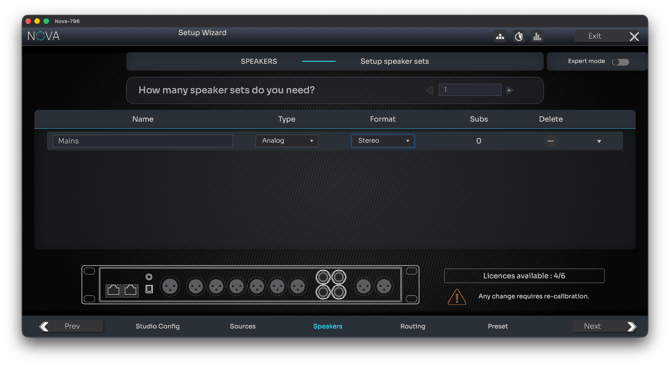
Choose how many speaker sets
Basic Mode works similarly to Source Declaration in basic mode. You begin by choosing how many Speaker Sets you need; the default is one.
You can add or remove sets by adjusting the number or by clicking the Delete ![]() button to remove a specific set from the list. Each Speaker Set can be renamed.
button to remove a specific set from the list. Each Speaker Set can be renamed.
For each Speaker Set, you can select the type of physical outputs from a drop-down menu: Analog, AES, or Dante.
You can also choose the speaker set format from a predefined list, which includes:
- Mono
- Stereo
- Stereo + Sub
- LCR
- LCR + Sub
- LCRS
- LCRS + Sub
- LRLsRs
- LRLsRs + Sub
- 5.0
- 5.1
- 6.0.
Add/Remove subwoofers
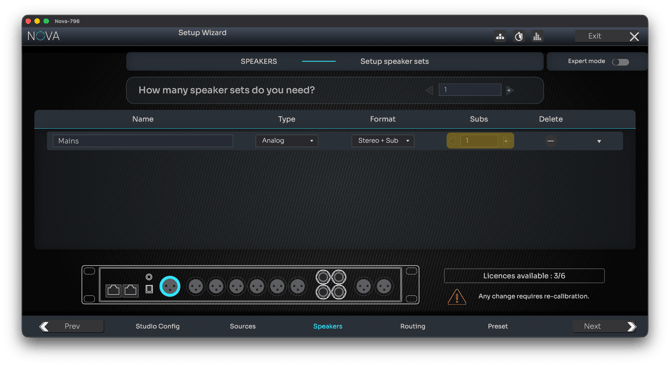
If the selected format includes a subwoofer, ![]()
![]() buttons appear in the Subs column, allowing you to add or remove subwoofers, within the limits of your available licenses.
buttons appear in the Subs column, allowing you to add or remove subwoofers, within the limits of your available licenses.
Routing Logic

Basic Mode applies the same default routing logic as for sources:
- The first Speaker Set assigned to Analog outputs will use the first available analog connectors.
- Subsequent Speaker Sets follow in order, up to six.
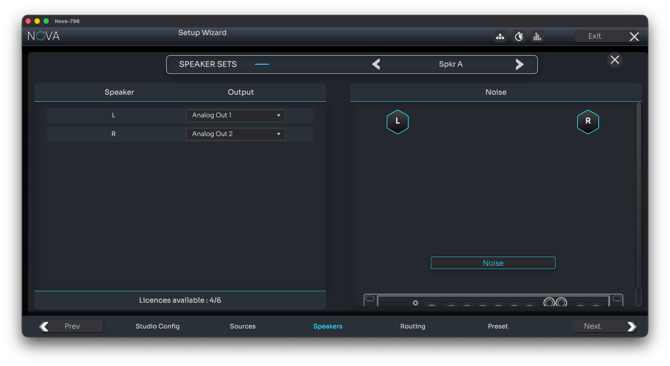
Clicking the arrow next to a Speaker Set expands the view to display its actual routing. You can play pink noise on any channel to check that routing is correct.
Interactive display
When hovering over a Speaker Set, the interface highlights where it should be connected on the rear panel illustration at the bottom of the screen.
Note: for information on Dante routing and behavior, refer to the Audio over IP section.
Tip: to create Speaker Sets that bypass the Optimizer or do not follow the default templates, switch to Expert Mode.
Warning: Available formats and the total number of speakers are limited by the number of licensed output channels on the processor.
Expert Mode
Expert Mode provides full manual control over how each Speaker Set is defined and routed. Compared to Basic Mode, the workflow is more flexible and closer to the Expert Source Declaration interface.
Instead of selecting the number of Speaker Sets from an increment field, Expert Mode uses dedicated controls: a ![]() button to add a new Speaker Set, and a Delete
button to add a new Speaker Set, and a Delete ![]() button to remove one.
button to remove one.
Each Speaker Set includes an Output Level Offset slider.
![]()
This allows you to apply a pre-calibration gain adjustment when your monitoring systems have significantly different sensitivities (for example, large mains versus a compact mono nearfield). This offset is applied before any calibration or alignment occurs.
Speaker routing
An Edit Routing button gives you direct access to routing from within this step, without waiting for the dedicated Routing Wizard. This is useful when the physical organization of outputs must be customized early in the workflow.
Use the arrows at the top of the screen to navigate between Speaker Sets. To return to the Speaker Declaration page, click the ![]() Close button in the top-right corner, just below the Wizard Exit button.
Close button in the top-right corner, just below the Wizard Exit button.
Optimized vs non-optimized speaker sets
Finally, each Speaker Set includes an Optimized toggle:
- Optimized Speaker Sets
Use licensed output channels and benefit from full acoustic correction. These sets participate in the complete calibration process and receive Optimizer processing. - Non-Optimized Speaker Sets
Do not consume licenses and only require physical output availability. They are still measured during calibration, but only to ensure level alignment with the Optimized sets. This guarantees consistent loudness when switching between monitoring systems, even though no correction curve is applied.
This configuration gives studios the flexibility to build hybrid monitoring environments, some fully corrected, others kept intentionally raw, while still maintaining seamless switching and coherent reference levels.
Relation to the Monitoring Section
Speaker Declaration defines the physical speakers.
The Monitoring and Setup/General/Volume menus defines how they behave during operation:
- Downmix configuration
- Custom function mapping to La Remote
- Dim & ref level behaviour
- Headphone outputs and behavior
Tip: Refer to the Monitor Control article for details about downmix profiles and monitoring workflows.
Next Step: Speakers & Sources Routing
Once your speakers are declared, the Wizard proceeds to Routing, where you can assign speaker to physical outputs, add pre-calibration EQ, declare them as full-range of multiway speakers and verify routing.
Tip: On NOVA, routing can also be edited directly from the Expert Mode of Speaker Declaration if you prefer to configure it earlier in the process.